Introduction
Background – different Excel plugins from SAP
Short reminder of the different tools available from SAP:
- Analysis for Office (AfO) – Plugin to be used for BW, but as well possiblemfor SAC, but only for accounting models (which are depreciated)
- Analysis for Office (AfO) – SAC Edition – same as AfO, but license and login via SAC account checked.
- SAP Analytics Cloud Plugin for Microsoft Excel
More details of when SAP recommends using which tool can be found in the following blogs:
If you are looking for an Excel frontend for SAC, you can try the classic AfO tool. This works, but only for the deprecated account model. Thus, AfO cannot really be used as an Excel frontend for SAC in the long term. You must use the SAC add-in!
One argument from SAP as to why they created a completely new add-in, as opposed to enhancing functions within the existing AfO tool, is that the new add-in supports additionally Excel execution in the browser.
A good starting point for learning how to use this tool is the SAP learning hub: Link
Short History
General look and feel of the SAC Excel plug-in
Installing the tool via the Microsoft app store, adding a table and entering plan values is straightforward. You just have to download it from the Microsoft App Store. Once installed, you will find a new Ribbon. Logon to your SAC tenant, select a data model, add the dimensions and your first report is ready.
With the help of formulas, you can add some more functionality to your workbook. If you start to use formulas for this plug in Excel already helps you to write the formula in the correct syntax. Not very well described within the documentation is how to address the properties of the BW dimensions in the formula (e.g. case sensitive, only member or as attribute.dimension)
The current behavior is described in the following SAP note: Link
For a better description of the usage, with an example, pls refer to this community discussion: Link
Simple planning scenario
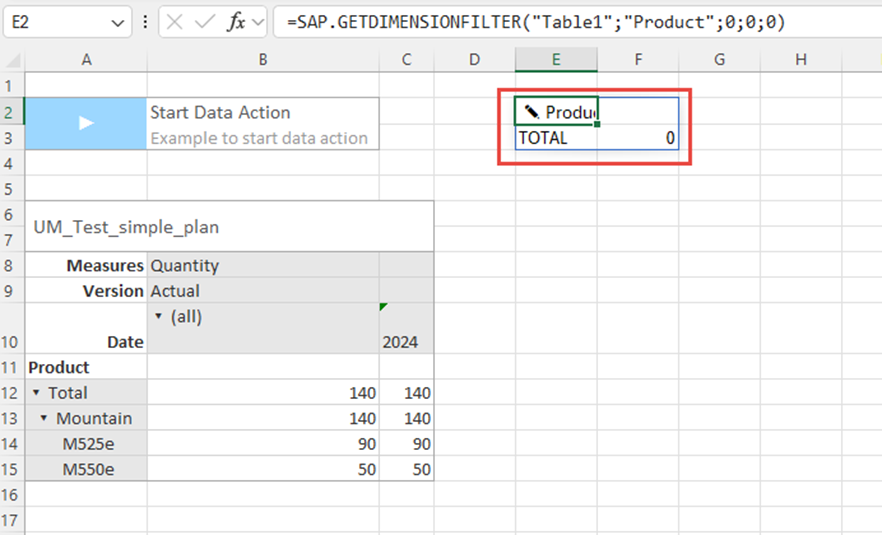
Data actions is also straightforward. Just select the function in the ribbon (Planning Starter). Then a button will be added in the design panel. You can select the data action and variables, if applicable.

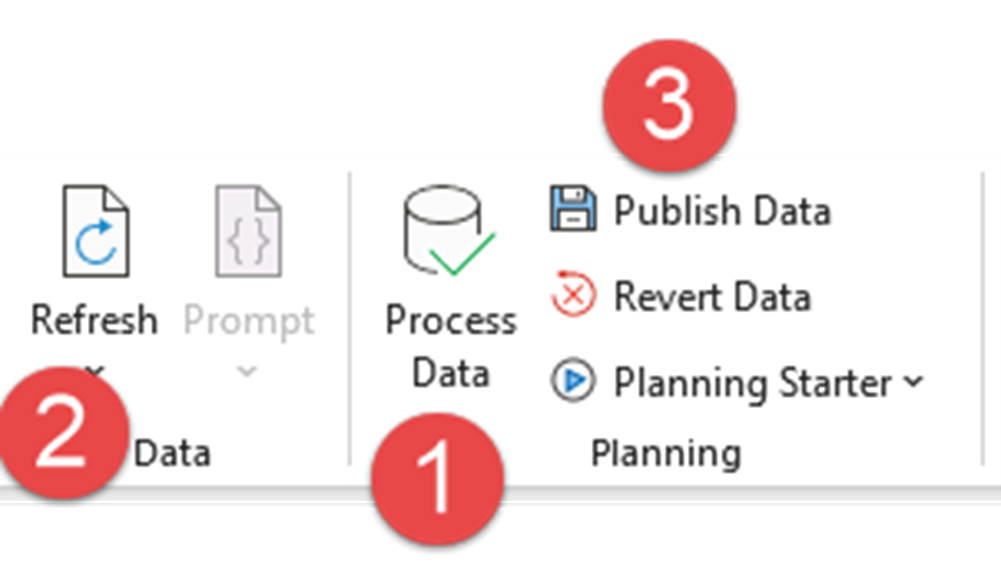
By default, all tables entered are planning enabled. Just type in the data. To process and save the data you must do the following steps, similar to AfO behavior:
- Process data. After you have processed the data, changed cells are shown in a different color like the web frontend
- If you have more than one table, you need to press one more button to trigger refresh of all tables
- Afterwards you can decide to publish the data or revert the changes
Usage for a simple planning scenario
Implementation of simple planning scenarios is easy.
Complex planning scenario
Now let’s have a look at a more complex planning scenario. This is where you would prefer an excel interface instead of the browser interface. Let us see how far we get with this scenario with this add-on.
Assume the following requirements:
- You have a lot of combinations to plan, and the list is too long to be handled within the browser
- You already have some pre-calculation within Excel and you like to link them to the planning layout
To make handling simpler for the users, with this scenario you would like to create a workbook with the following features:
- Open Excel file, press a custom button to update data. For this we need a script language to link the functionality from the ribbon to custom button in the workbook
- A table with reference columns and input ready columns, showing reference columns, clearly marked as NOT input ready
- Add new lines, e.g. for new customer – material combinations. Perhaps paste several lines from a different preparation Excel
- Press a custom button to process, refresh and publish data. Again, we would need a script language for this requirement.
If you have an occasional user which should use an input layout, it is much simpler for them to have a custom button instead of explaining them where to find the functionality in the ribbon.
Status of required functionality
| Title (with Link) | Status | Comment |
| Support for Office script API's |
Planned (long-term) Submitted August 2021 next update Q1/2025 |
To group functionality of different buttons / formulas in a button the support of a script language is required. Microsoft pushes toward script language. But it seems SAP is waiting for Microsoft …, |
| Visualization of locked data cells in Excel O365 Add-in |
Planned (long-term) Submitted Apr. 2022 next update Q3/2025 |
Perhaps you can find a workaround with some Excel functionality and text in the header |
| Plan on (copy-paste) multiple new lines in a table (directly in SAC) |
Planned (long-term) Submitted Aug. 2021 next update Q1/2025 |
Adding multiple new lines is not even possible directly in SAC. In SAC you now have the Workaround with the file upload (since Q3 2024) |
| SAP Analytic Cloud Excel Add-in (SAC) - Add Member |
Planned (long-term) Submitted June 2022 next update Q1/2025 |
New lines in the Excel plugin are only possible with display unbooked lines (hope you can filter) or working with the function SAP.SETDATA (see below) |
| Enable customized planning area in Excel Add In |
Planned (long-term) Submitted March 2023 next update Q3/2024 |
This sounds like only technical relevant. But it is very important if your planning is on a big database. Without this feature SAC add-in may have performance problems or even will not be possible |
| SAC Excel Add-in does not allow publishing of data by version as in SAC Story |
Submitted Submitted June 2024 |
This may be relevant if you work with several versions in the Excel sheet |
|
Jump from SAC Data Analyzer to SAP Analytics Cloud add-in for MS office 365 |
Acknowledged Submitted May 2024 |
Jump from the SAC data analyzer to the Excel plugin would help to increase acceptance of add-in and helps users with complex requests |
Workaround for new lines
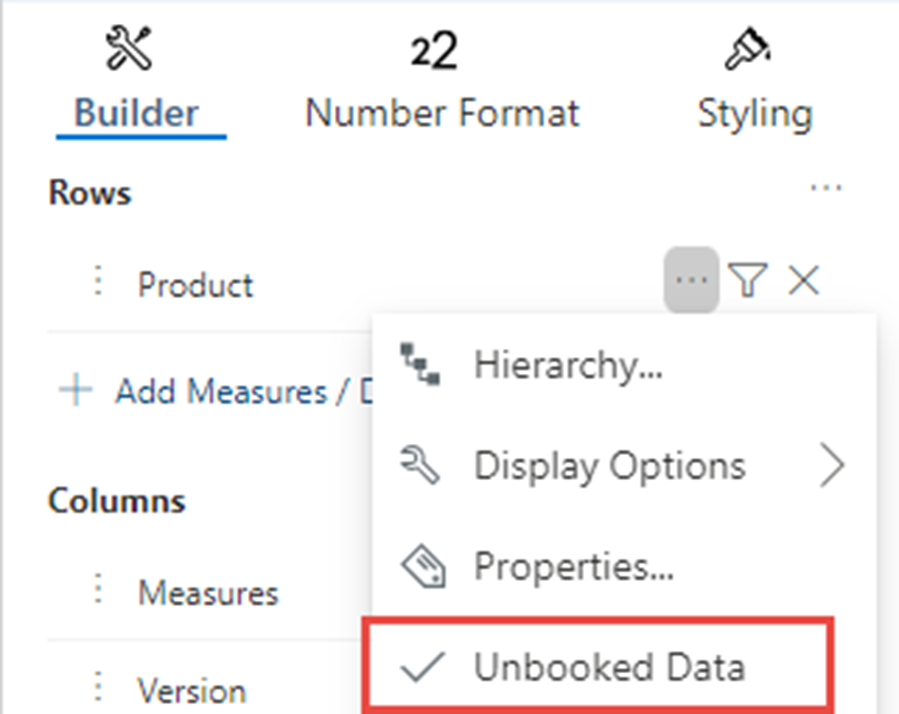
In case this is not possible, e.g. for an attribute with lots of master data which has no good hierarchy selection available, you must check for different options.
One way would be to use the (since Q3 2024) available file upload function in the browser. Of course, you would have to leave the Excel interface, but with a certain link this may be a solution.
One other solution would be to work with formulas. Could we use these formulas to create new lines? In principle this is possible, but the question of user friendliness is another, it’s up to you to decide.
Here is the way to go:
- Use formular
SAP.SETDATAto create new combinations - Formel
SAP.GETDIMENSIONFILTERto allow the user to select the required IDs for the new combination
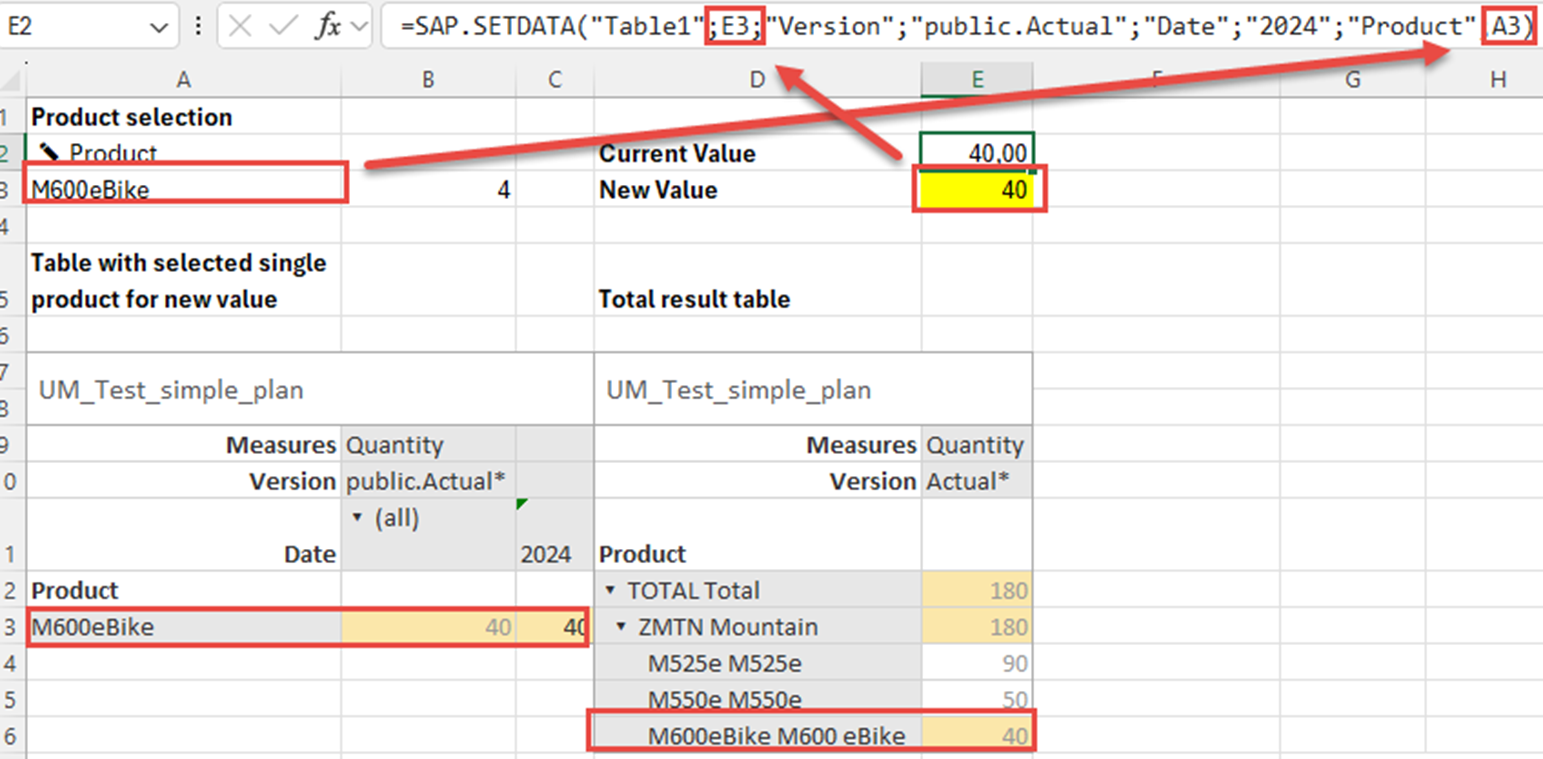
With the formula SAP.SETDATA you can change values for any combination of attributes including creation of any new combination. But you need to specify all attributes. Normally the user does not know the IDs by heart and wants to type them in. You can use the dimension filter formula to let the user select the attribute. In the SETDATA formula you then link to this selected ID. Just make sure, the user selects only one item!
As you want the user not only to see the selected item for which to create a new line, we will use two tables.
The following screenshot will show this scenario while selecting a product. Pls ensure to tick “Show unbooked Members”!
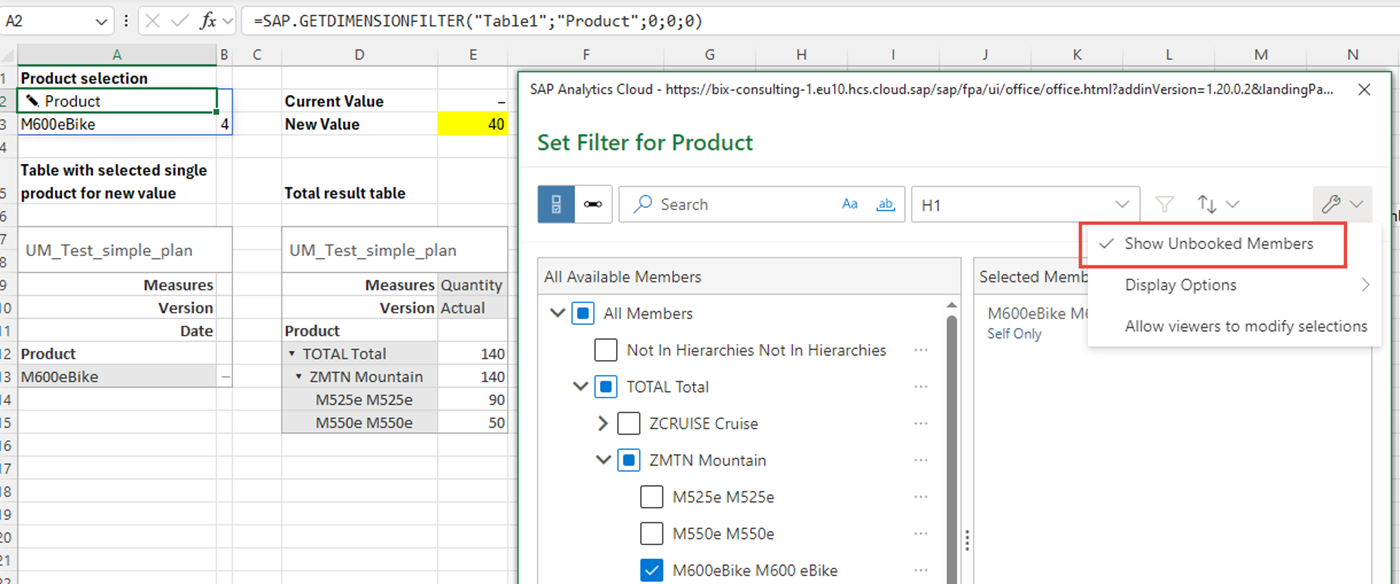
Once you entered the new value and pressed process data AND refresh data in all tables, values will look as follows. In this screenshot you see as well the formula SETDATA and how the product selection is linked to the SETDATA formula:
Usage for a complex planning scenario
None of our requirements for a complex planning scenario is supported right now, however, they’re on a wish list with SAP. In the event you cannot wait for SAP to implement these functionalities, you must check if you can go without, or indeed find workarounds.
Conclusion
Erstellt im November 2024


